


Making your own natural henna paste at home is very easy and requires only a few ingredients. Unlike store-bought henna cones, homemade henna cones are safe to use on the skin as you are aware of everything that has gone into making them.
Table of Contents
How to make Henna Paste
The most important thing is to ensure you are using good-quality henna powder.

Henna powder comes in many forms and varieties. Some result in a creamy paste and others provide a stringier paste. The most popular are Sojat and Rajasthani henna powders. Look for the triple-sifted or five-times-sifted henna powders, as these will make it easy to mix and you’ll get a smoother paste.
You will also need an essential oil, such as eucalyptus or cajeput. Lavender essential oil can be used for sensitive skin. Henna paste can be mixed with water or lemon juice. It is believed that using freshly squeezed lemon juice to mix the paste may provide darker stains.
However, mixing paste with water will also provide fairly dark stains. Generally, henna stains are darkest on the palms and soles of the feet, as the skin is thicker on those areas and the dye can penetrate deeper.
On the top of the hands, the stains tend to be less dark due to the thinness of the skin.
Mehndi Blog

Yield: 4 to 5 medium cones
Time: 12 to 24 hours Supplies
- ¼ cup (25 g) body-art-quality henna powder
- 2 teaspoons
- Essential oil
- Teaspoons sugar
- Water or lemon juice

Equipment
- Bowl
- Spatula
- Plastic wrap
- Nylon stockings
- Carrot bags
- Pre-rolled empty cellophane cones
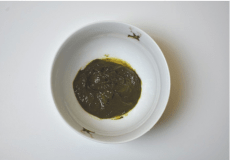
- Add henna powder, sugar, and essential oil to a bowl.
- Mix the paste with the spatula, adding water or lemon juice gradually until you get a lumpy, toothpaste-like consistency. Keep mixing so that most of the lumps disappear. Don’t worry if some lumps remain, as these will dissolve during dye release.
- Cover the paste with plastic wrap and let it sit at room temperature for 12 to 24 hours while the dye release takes place. This may take the full 24 hours if you are using lemon juice.
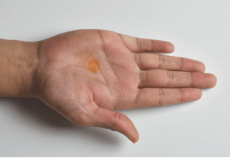
- You will know dye has released if the top layer of the paste is darker than the lower layers. Another way to check is to do a 5-minute paste test on the palm: Leave some paste on the hand for 5 minutes. You should be left with a bright orange stain on the skin, indicating the paste is ready to use.
- Now it’s time to adjust the consistency. The paste will be quite thick at this point, so add in a little water (or lemon juice) and mix until it becomes a smooth and silky consistency. How thick or thin the henna paste will be depends on personal preference. With more practice, you will be able to identify how thick or thin you prefer.
- The next step is to strain the henna paste. This is the process of pulling the paste through a thin, mesh-like material to get rid of all remaining lumps and get the smoothest paste. Put the henna paste in a nylon stocking and put the stocking in a carrot bag. Twist and hold the bag with one hand and pull the stocking out of the carrot bag with the other hand. Once the entire stocking has been pulled out of the bag, you should be left with smooth henna paste ready to be put in to cones.

- Cut the tip of the carrot bag and place it in the empty cellophane cone (see How to roll a cellophane Cone for how to make a cellophane cone). Squeeze some henna paste into the cone.
- Fold the end of the cone and use scotch tape to close it securely. Repeat with remaining cones.
Introduction to Henna, What is Henna, History of Henna


Pingback: How to Roll a Cellophane Cone? - Mehndi Designs
Pingback: Burma Mehndi Design: Intricate and Exquisite Patterns for the Modern Bride - Mehndi Designs
Pingback: Achieving Dark Henna Stains and Aftercare Guidelines - Mehndi Designs